Moodboards: What Are They, What Are They For, and How Are They Made?
![]() Rocío Cortázar · 12 Feb, 2026 · Diseño Gráfico · 6 min
Rocío Cortázar · 12 Feb, 2026 · Diseño Gráfico · 6 min

Design is a discipline that encompasses a wide range of elements, from colors and shapes to typographies and textures.
Have you ever wondered how large-scale projects, such as high-budget advertising campaigns, presentations, and extensive multi-page sites, can maintain the consistency of their projects while also surprising us with visual intrigue and creative expression?
Before starting a design project, it is crucial to establish a clear and consistent direction. This is where moodboards come into play. Today we will talk about their power, how they can help creative teams act aligned with the same goal or prevent freelance designers from losing focus.
What is a Moodboard?
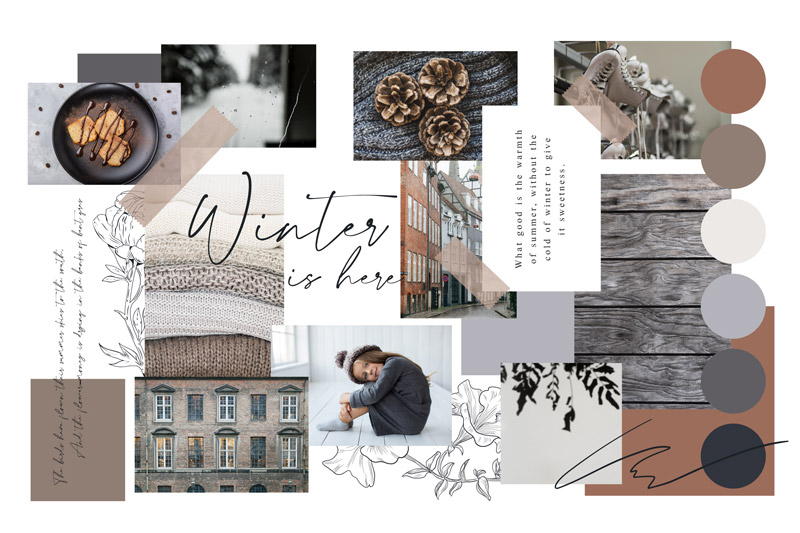
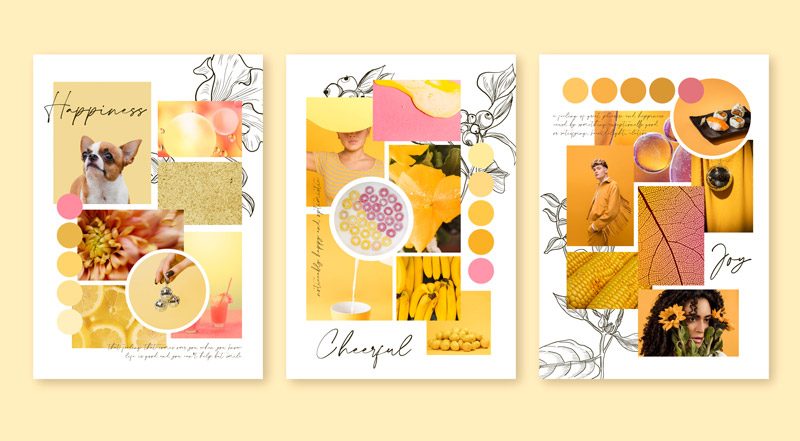
A moodboard is a visual tool used in design to communicate and represent the aesthetic, mood, and direction of a project, what young people today would call the “vibes.” It consists of a collection of images, texts, colors, textures, and visual elements that help define the essence and atmosphere that is sought to be achieved in a design or project.
Moodboards are an effective way to convey abstract ideas tangibly. They allow designers and clients to have a shared understanding of the vision and focus of the project, which facilitates decision-making and goal alignment.
In short, moodboards can be explained as a set of visual elements and ideas that, when organized on a board, inspire and guide the trajectory of the most complex design projects.
We will fill the board with visual elements, ideas, narratives, or anything that comes to mind and reinforces the focus. Moodboards will give you confidence during the process, whether you work in a team or alone.
A moodboard can be physical or digital, depending on your preferences and how collaborative you want it to be. Thanks to applications like Figma or Adobe Express, it is now easier than ever to collaborate with anyone in the world practically without restrictions.
Moodboards are very useful for graphic designers, marketing specialists, and other creatives. They help organize ideas, visual elements and generate inspiration and quickly convey the style of the project, making it much easier to maintain consistency throughout. However, be prepared to do a lot of reflection and exercise creativity.
What Are Moodboards For?
Moodboards serve several key functions in the design process:
1. Inspiration and Creativity
Moodboards serve as a source of inspiration for designers. By gathering a variety of visual elements that evoke a certain feeling or style, designers can explore ideas and design concepts in a more free and creative way.
2. Visual Communication
Moodboards are an effective communication tool for conveying ideas to clients or other members of the design team. Instead of relying solely on verbal description of a project, a moodboard allows for visually showing the desired direction, which facilitates understanding and decision-making.
3. Coherence and Consistency
Maintaining coherence in a design project is fundamental to achieving a successful outcome. Moodboards help establish a color palette, typography, and consistent visual aesthetic that will be maintained throughout the project, ensuring a uniform look and feel.
4. Decision Making
Moodboards can help clients make more informed decisions about the direction of a project. By seeing a visual representation of the proposed ideas, clients can assess whether the design aligns with their goals and expectations.
5. Time and Resource Saving
Using moodboards can save time and resources by reducing the need for significant changes in the later stages of design. By establishing a clear direction from the beginning, rework and revisions are minimized.
How to Create an Effective Moodboard
Now that we know what moodboards are and why they are important, let’s see how you can create one effectively:
1. Define the Objective and Target Audience
Creating a moodboard without understanding your project’s objectives is like building a house without foundations. It is crucial to understand the purpose of the moodboard and for whom it is intended. Are you creating a moodboard for a particular client or as part of your personal brainstorming process? What are you trying to achieve? What emotions do you want to evoke? Answering these types of questions will help you define the objective to select the right elements.
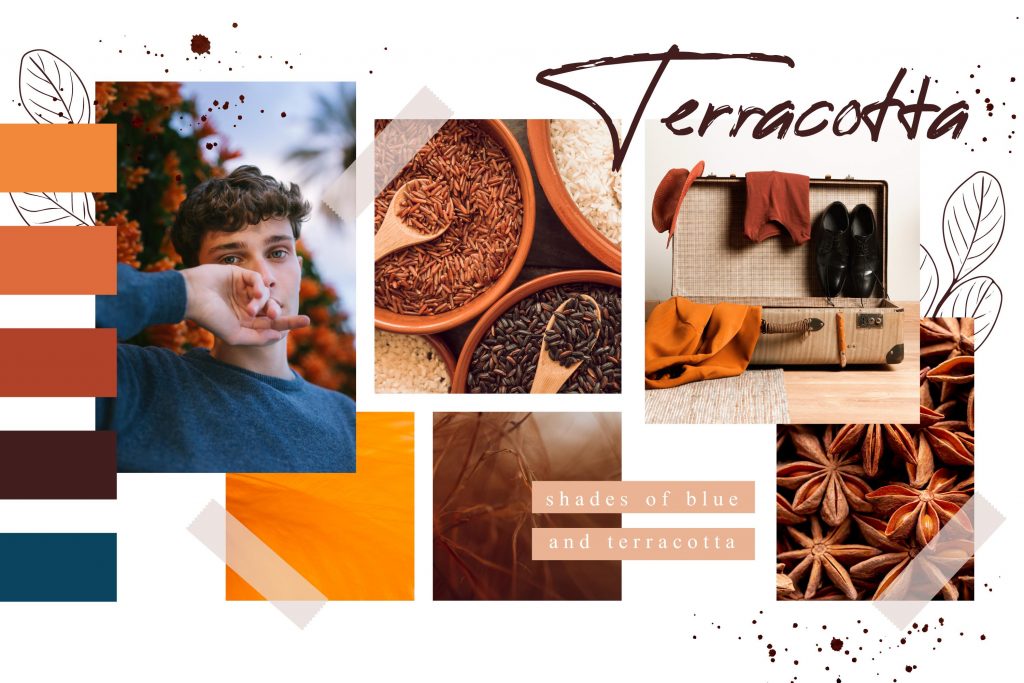
2. Choose a Color Scheme
Color is one of the most powerful tools in design, capable of evoking different emotions and creating moods. It is important to choose a color scheme that aligns with the project’s goals and emotions. Whether it’s a monochromatic or complementary scheme, make sure to choose tones that match and evoke those goals. If you have trouble choosing colors, I recommend you read our series of articles on color:
- Color Theory – Part I – The Meanings of Colors
- Color Theory – Part II – Basic Properties of Color
- Color Theory – Part III – Creating Color Schemes
3. Choose the Right Tool for Your Case
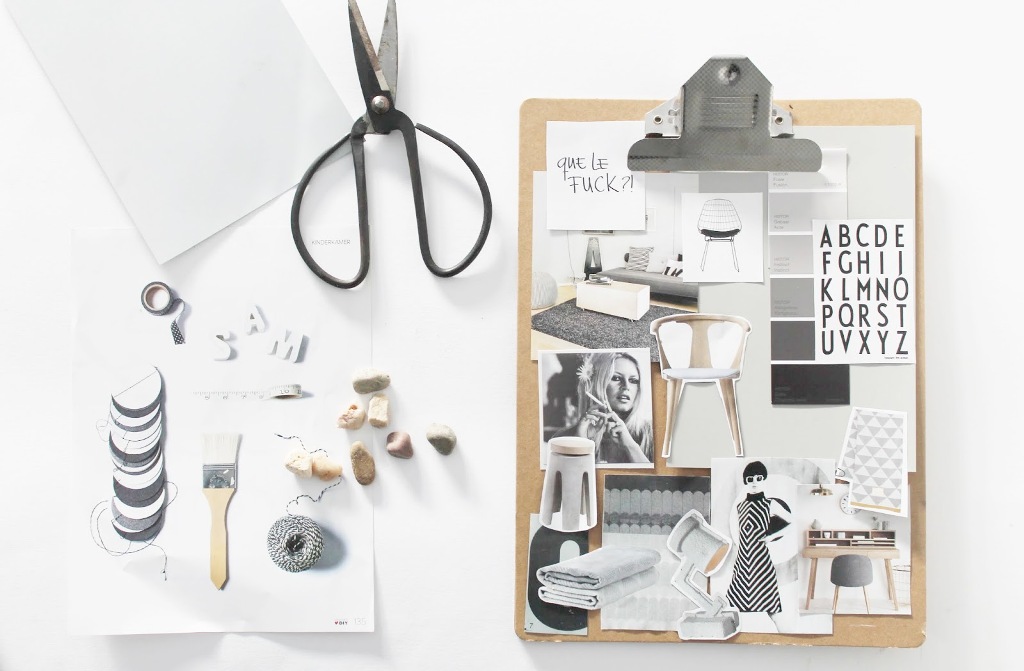
It is important to choose the right tool to create your moodboard. Many computer tools like Figma, Sketch, Adobe InDesign, Canva… are perfect for creating a digital moodboard. But if you’re old school and find these programs challenging or if you prefer physical support, then get magazines, photographs, fabrics, prints, or even make your own sketches to create your moodboard. Think about which material works best with your workflow and what the project needs.
Of course, they are two completely different supports, and each has advantages and disadvantages.
If you use editing software, you will have hardly any limitations, you can collaborate with anyone around the world in real-time, it is better for larger teams, unlimited space, always available and saved, it is easy to do, undo, and redo… Although we lose physical interaction making it less sociable, if too many people are editing the file it can quickly become an idea chaos, if you have a bad connection you will have problems, and the sensory factor is lost.
The physical support stimulates participation from the entire team and is a more practical approach, it is a multisensory experience and is generally more fun. Although it is not a viable option for international teams or those not in the same city, the space is limited (as large as our canvas), we do not have as much editing capacity, and it involves prior preparation of all materials.
4. Gather Inspiration
Start by collecting a wide variety of visual elements that inspire you and relate to the project in question. You can look in magazines, photographs, illustrations, color samples, typography examples, and any other relevant elements.
After establishing the project’s objectives, it’s time to start collecting visual inspiration for the moodboard. Luckily, inspiration can come from practically anywhere, from the most mundane things to the most extraordinary. At this point in the process, you can allow yourself to choose a lot of material, everything that seems interesting or that will contribute something, don’t worry about the quantity at this point, the more, the better, we will sift through in the next step to keep the most significant elements.
5. Organize and Select
Once you have gathered enough inspiration, organize the elements on your moodboard.
From all the elements you have collected, carefully select those that best represent the aesthetic and atmosphere you want to achieve in your project. Ensure there is coherence and balance in the composition.
6. Experiment with Layout
No matter how clear your initial ideas are, to create a good moodboard, we must go through a process of trial and error, as with everything in life. Don’t be afraid to play and experiment with the layout of the elements on your moodboard. If something doesn’t work, change it! Try different arrangements and compositions to find the one that best conveys your vision. The layout of the elements can have a significant impact on the overall impression.
And if at any point you doubt, ask yourself: “Does this element, color, design (or whatever) really align with the objectives?”
7. Add Notes and Descriptions
Include notes or descriptions that explain why you selected each element in your moodboard. This will help others understand your thought process and the intention behind your choices.
Once your moodboard is complete, share it with stakeholders, whether clients, colleagues, or design team members. Gather their feedback and suggestions, and use their input to refine and improve your moodboard if necessary.
In summary, moodboards are an essential tool in the design world that help define the direction and aesthetics of a project. By identifying your objectives, gathering inspiration, choosing a color scheme, using the right tools, experimenting, and perfecting your work, you will create a coherent and powerful moodboard that will communicate your message and take your design projects to the next level.


 Graphic Designer in Your Company")


